
This quilt was made using the fabric line "Backyard Baby" by Patti Sloan for Michael Miller and a few odd solids (grey and teal)
The finished size is 22.5" by 22.5".
The three leaves that float across the quilt are tacked on after the rest of the quilt is finished.
Fabric Requirements:
- Green Snake Skin print - 1/4 yd
- Orange Snake Skin print - 1/4 yd
- Teal solid - 1/8 yd
- Grey solid - 1/8 yd
- Birch Tree Stripe - 1/4 yd
- Windy Day print - 1/8 yd
- Green Snails Stripe - 1/8 yd
- Scrap of dark green solid (3" x 9" would work)
- Scrap of light green solid (3" x 9" would work)
- Scrap of fusible web (3" x 9" would work)
A consideration: some of these prints are directional. If you want to fussy cut or otherwise position the print in a specific orientation you might want to buy a little extra fabric. For instance - the Birch tree print used in my outer border could have been made to look like a mitered frame....if I had had more yardage.
You will need additional fabric for the backing (3/4 yd) and binding (1/4 yd would be more than enough).
The Plan:
To make this quilt you will need to construct 9 5" blocks.
Four like this:
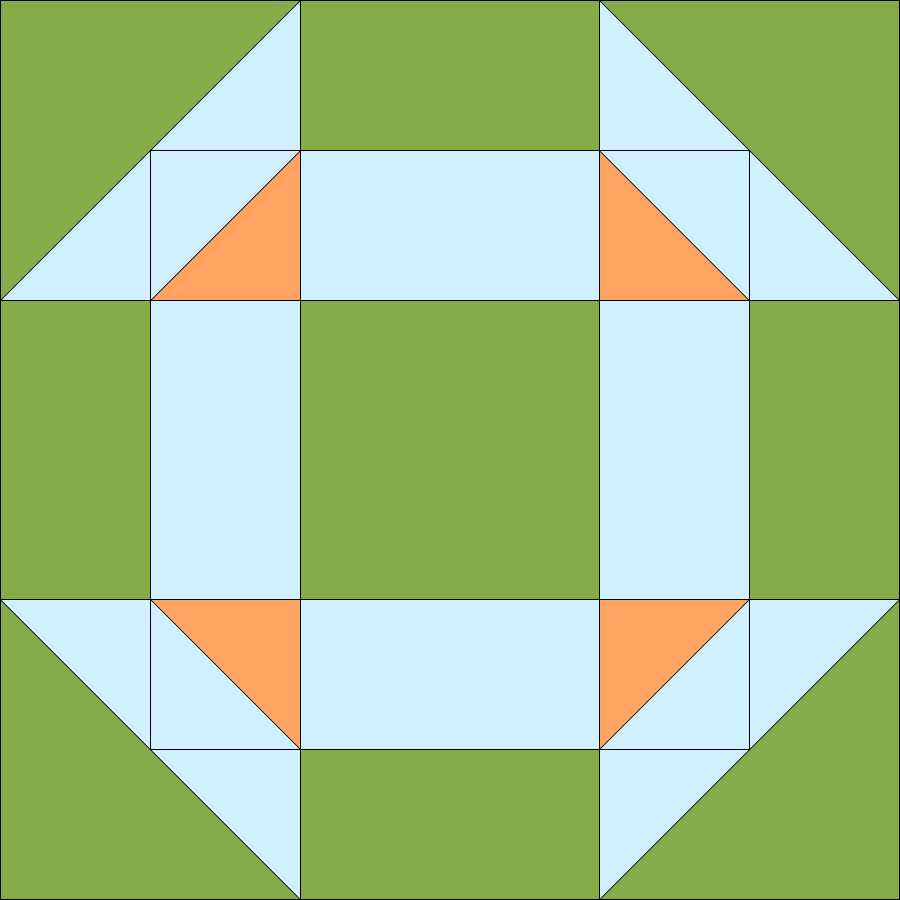 |
| Block A |
One like this:
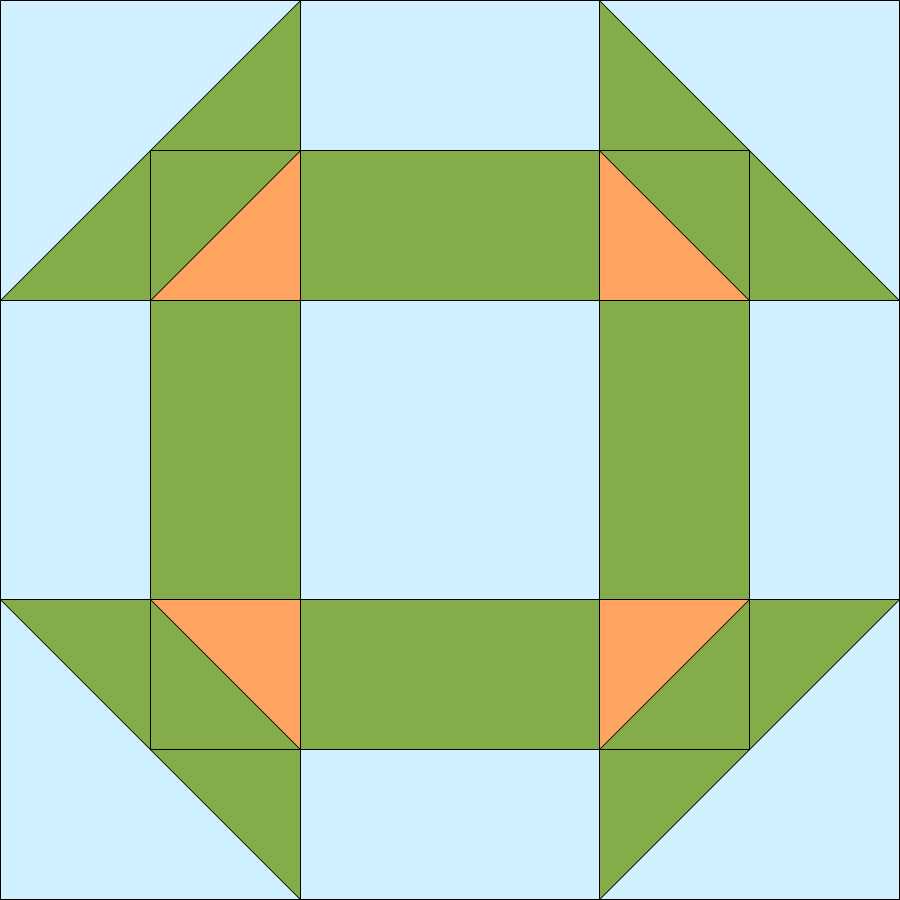 |
| Block B |
 |
| Block C |
All of these blocks are constructed of 9 patches.
Block A and B are constructed in the same manner, but the color placement of blue and green are reversed. You will use the same directions to make all five of these blocks.
Block A:Cutting directions:
- from Green Snake Skin cut -
- 8, 3" squares
- sub-cut these squares once on the diagonal to make 16 large triangles (these are for the corners)
- 24, 2 1/2"x 1 1/2" rectangles (these are for the outer edges)
- 4, 2 1/2" squares (for the centers)
- from Birch Trees Stripe cut -
- 24, 2 1/2" x 1 1/2" rectangles (these make the bars that form the rings)
- 16, 1 7/8" squares
- sub-cut these squares once on the diagonal to make 32 small triangles (these form the wings of the inner ring)
- 8, 2" squares (these will be used to make HSTs with the orange bits)
- from Orange Snake Skin cut -
- 8, 2" squares
- Edge patches -
- Sew rectangles together in pairs - one green rectangle and one blue rectangle - to make 12 2 1/2" squares.
- Iron seams to the blue side
- Set aside
- Corner patches -
- On the 2" blue squares, on the wrong side of the fabric, draw a line diagonally.
- With right sides together, sew 1/4" from the line, on each side of the line, one blue square to one orange square.
- Cut on the line.
- Iron seams open forming 16 hst patches that are half blue and half orange.
- Trim hsts to 1 1/2" squares.
- Carefully sew small blue triangles to the blue sides of these hsts making a large triangle with a little orange corner. Remember you are dealing with triangles - align the right angled corner with the right angle of the hst. You will have "bunny ears" sticking out when you are done.
- Iron seams away from the hst.
- Trim "bunny ears"
- With right sides together, align right angles of blue and orange triangles with right angle of large green triangles.
- With blue and orange triangle on top of stack, sew 1/4 inch from edge of blue and orange triangle along hypotenuse.
- Iron seam toward large green triangle.
- Trim to 2 1/2" square. You should have 16 of them.
- Block -
- Use the picture to make sure you have everything aligned correctly.
- Sew 8 sets of three: (iron seams toward edge block)
- corner square, with orange touching blue rectangle
- edge square, with blue rectangle touching orange
- corner square with orange touching blue rectangle
- Sew 4 sets of three: (iron seams toward edge block)
- edge square, with blue touching center block
- center block
- edge square, with blue touching center block
- Sew blocks together with orange in the seams.
- Trim blocks to 5 1/2" squares
Block B:
Cutting directions -
It is time for lunch.....
Okay, I can think again.....
- 2, 3" squares
- sub-cut these squares once on the diagonal to make 16 large triangles (these are for the corners)
- 4, 2 1/2"x 1 1/2" rectangles (these are for the outer edges)
- 1, 2 1/2" squares (for the center - you might want to fussy cut this one)
- from Green Snails Stripe cut -
- 4, 2 1/2" x 1 1/2" rectangles (these make the bars that form the rings)
- 4, 1 7/8" squares
- sub-cut these squares once on the diagonal to make 8 small triangles (these form the wings of the inner ring)
- 2, 2" squares (these will be used to make HSTs with the orange bits)
- from Orange Snake Skin cut -
- 2, 2" squares
Block C:
Cutting Directions:

- from solid teal cut -
- 16, 2 1/2" squares
- from solid grey cut -
- 2, 3 1/4" squares
- sub-cut diagonally twice, into 8 little triangles
- from Orange Snake Skin cut -
- 2, 3 1/4" squares
- sub-cut diagonally twice, into 8 little triangles
- from Green Snail Stripe cut -
- 8, 3" squares
- sub-cut once diagonally into 16 large triangles
- from Windy Day print cut -
- 8, 3" squares
- sub-cut once diagonally into 16 large triangles
- Corner patches -
- With right sides together sew one blue triangle to one green triangle
- Press open
- Trim to 2 1/2" square
- Make 16
- Center patches -
- Using great care to sew them all the same sew one small grey triangle to one small orange triangle.
- Sew 8 sets.
- Iron seam toward the orange.
- Snuggle seams together and sew 4 sets of orange/grey triangles together along the hypotenuse.
- Pop seams, iron flat.
- Trim to 2 1/2" square
- You should have 4.
- Block -
- Use the picture to make sure you have everything aligned correctly.
- Sew 8 sets of three: (iron seams toward edge block)
- corner square, with green triangle touching teal square
- edge square, with teal square touching green triangle
- corner square with green triangle touching teal square
- Sew 4 sets of three: (iron seams toward edge block)
- edge square, with teal touching orange triangle of center block
- center block
- edge square, with teal touching orange triangle of center block
- Sew blocks together with grey triangle in the seams.
- Trim blocks to 5 1/2" squares

Arrange blocks in accordance with this picture. Note that the edge blocks do not all have the same orientation. If you arrange them correctly you will create the illusion of large blocks on point.
Border #1:
Cutting Directions:
- from Orange Snake Skin print cut -
- 2 strips, 1 1/4" x 15
- 2 strips, 1 1/4" x 17
Border #2:
Cutting Directions:
- from Orange Snake Skin print cut -
- 2, 2 1/2" squares
- sub-cut squares once on the diagonal creating a total of 4 small triangles.
- from Birch Tree Stripe cut -
- 2, 2 1/2" squares
- sub-cut squares once on the diagonal creating a total of 4 small triangles.
- 4, 2" x 17" strips
- Sew small triangles together along the hypotenuse to make 4 hsts.
- Iron seams open.
- Trim hsts to 2" square.
- Sew 17" striped strip to opposite sides of top.
- Iron seam toward stripes.
- Sew orange side of two hsts to short ends of each of two strips.
- Iron seam toward stripes.
- Sew these pieces to opposite sides of top, aligning orange/striped seams.
Bind and quilt as desired.
Leaves:
- Iron fusible web to wrong side of dark green scrap
- Fuse dark green scrap to light green scrap
- Cut 3 leaf shapes from this two sided piece.
- Iron leaf shapes in half along their longest dimension
- Tack leaves to top of quilt. I tacked them along the ironed in crease.
2 comments:
This is awesome! Thank you so much for making this pattern! So clever!
I did it just for you. I hope it works....if not just drop me a note. It should, but I wrote it from my notes.
Post a Comment