Followers

Friday, January 17, 2014

A Day Late....

...and a dollar short.  Well, that is how the saying goes.  I hope it isn't quite the case here.

Yesterday marked the publication of my 16th pattern for Moda Bake Shop.  Wahoo!!!

"Bedazzled" is a happy, twinkly quilt that was fun to make and perfect for chasing away the winter blahs.  I think it will look great in other fabric lines too.  In fact, I designed it using "Scrumptious" by Bonnie and Camille.


I bet it would be fun in blacks and whites too.

Life at Tops to Treasures has been a whirlwind of late.  It seems that there are always several irons in the fire.  I have to admit, life is never dull around here.  

Look for a few more fun things in the days to come....

My work is to be featured in McCall's magazine sometime soon.  Some of you will remember a quilt I made a few months ago.  It used "Hearty Good Wishes", a beautiful new line from Moda inspired by winter on the English coast.  I haven't seen the magazine yet, but if you do, and you see a beautiful blue and beige quilt in it, think of me.

I also have two more quilts in the works for the Bake Shop.  The next one features "Printemps" by 3 Sisters. It is my most ambitious project to date...but I am also donating the sample quilt to my local guild.  You don't have to make it to own it!!   Turns out I didn't have to make it either!  


I am thrilled to have a team of friends from the guild willing to come help...when my cat will let them.

Time to get back to work....

Thursday, January 16, 2014

S'more Rows.5 Paper Pieced Trees


Paper Pieced Trees
(rows 3 & 7)
 

There is nothing like the thrill of making a pieced block that is crisp and neat.  Imagine your points being pointy and the edges looking like they were drawn that way.  That is what paper piecing is all about.

I know that there are those that abhor this process.  Please stick with me...maybe I can change your mind....or not....if you really can't stand the process feel free to make trees following your own method.  Just remember that you need 12 of them measuring 5 1/2" x 5 1/2" square.

Fabric Requirements:
  • Background - 1/2 yard - I used Aqua Star bursts (SKU #37075-17)
  • Greens - 13" (a generous 1/3 yard) - I used various scraps
  • Trunks - 1/8 yard - I used Brown wood (SKU #37079-19)
  • Paper - 12 sheets - I used regular printing paper

Cutting Directions:

 For newcomers to paper piecing.  The pattern is broken into sections, annotated with a letter.  Each section is broken into pieces, annotated with numbers.  The numbers represent a suggestion about what order to sew the pieces in.  (For ease of construction I have labeled the cutting instructions to correspond to the pattern.)


In general, you piece the pieces in each section, then piece the sections together to make the block....like a paper and fabric puzzle.  For further instructions please refer to my tutorial.
  • Background
    • A1 & A3 -
      • cut 2, 2 1/2" x width of fabric (wof) strips
      • sub cut into 24, 2 1/2" x 3 1/2" rectangles
    • B1 & B3 -
      • cut 2, 2 1/2" x wof strips
      • sub cut into 24, 2 1/2" x 3 1/2" rectangles
    • C1 & C3 -
      • cut 2, 2 1/2" x wof strip
      • sub cut 1 strip into 21, 2 1/2" x 2" rectangles
      • cut 3 more 2 1/2" x 2" rectangles from second wof strip
      • set remnant , 2 1/2" x 36 ish" aside
    • D1 & D3 -
      • cut 1, 2 3/4" x wof strip
      • sub cut into 24, 1 1/2" x 2 3/4" rectangles
      • set remnant, 2 3/4" x 6 ish", aside
  • Greens - from scraps
    • A2 - cut 12 - 2 3/4" x 3" rectangles
    • B2 - cut 12 - 4 3/4" x 2 1/4" rectangles
    • C2 - cut 12 - 5 1/2" x 1 3/4" rectangles
  • Trunks
    • D2 -
      • cut 1, 1 1/2" x wof strip
      • sub cut into 12, 1 1/2" x 1 1/2" squares
      • set remnant, 1 1/2" x 24 ish", aside
  • Papers
    • When you print the pattern be sure that your settings are as follows
      • Fit to printable area - NO!!! 
    • Print one page and measure the pattern pieces
      • The solid line rectangles should all measure 5" wide.  The rectangle at the top of the page should measure 1 1/4" tall.
    • Once you are sure the pieces print out correctly, print the remaining 11 pages.
    • Print 12 copies of this
    • Cut into 4 rectangles
      • according to dotted lines (sections - A, B, C, and D)
      • some distance to the outside of the dotted lines.
 
Break Time!!

 
There is no way that I would make a whole quilt out of these little blocks.  I love paper piecing...but not that much!!  It might, however, be fun to make a mini with them.  Imagine the fun you could have decorating the trees?!
 
A mini made from a 2 x 3 grid of these 5" blocks, and bordered with two borders to frame it (1/2" inner and 2" outer) would measure 15" x 20".  You would need few additional fat quarters to finish it.
 
 
and back to the current project....
 
Paper piecing is all about order.  In this case slow and methodical wins the race.
 
Sort your pieces, paper and fabric, in to piles
  • Pile A
    • 12 paper "A" rectangles
    • 12 green 2 3/4" x 3" rectangles
    • 24 background 2 1/2" x 3 1/2" rectangles
  • Pile B
    • 12 paper "B" rectangles
    • 12 green 2 1/4" x 4 3/4" rectangles
    • 24 background 2 1/2" x 3 1/2" rectangles
  • Pile C
    • 12 paper "C" rectangles
    • 12 green 1 3/4" x 5 1/2" rectangles
    • 24 background 2" x 2 1/2" squares
  • Pile D
    • 12 paper "D" rectangles
    • 12 brown 1 1/2" x 1 1/2" squares
    • 24 background 1 1/2" x 2 3/4" rectangles
 
Sewing Directions:
  • Make 12 blocks paper pieced blocks.  If you are new to paper piecing refer to my tutorial for further instructions. 
  • Set the blocks aside. 
    • They will be combined with next months block to make rows 3 & 7 of the project.
    • DO NOT REMOVE THE PAPERS YET.  They will keep your blocks square while awaiting the rest of the blocks for these rows, and assist you in piecing the rest of the row.


Thursday, January 2, 2014

Looking Back at December 2013

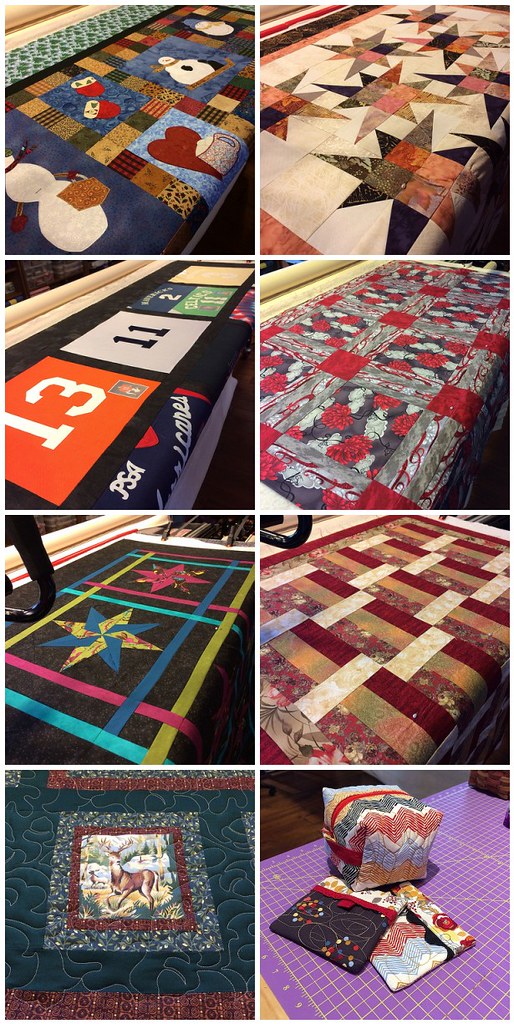
Business wasn't overwhelming this month.  I only worked on 7 quilts for customers (one of them being my Mom's quilt that ended up beinging wrapped as a surprise for her under the tree.)  That was a good thing.

Between holiday parties, and an ice storm that locked North Texas up for a week, and family visits there wasn't a whole lot of time for quilting.  Here is a peak at what I did.


Tops to Treasures 12/2013

I also spent a day at Happiness is Quilting sharing tips on fussy cutting.  (I will be there again this coming Saturday, Jan 4 to teach my Midwinter Cozy quilt.)

I'm glad to be looking ahead to 2014.  There are lots of fun things planned for Tops to Treasures, new patterns to debut on Moda Bake Shop, another quilt for a magazine, and several classes for Happiness is Quilting.

You could say I've hit the ground running in 2014.  Please pray for stamina!  

My Johnny is in his last semester of his last year of high school.  (For my European friends that is his 12th and last year of public school.  It is a very exciting time for them.)  Next fall he will be off to college.  He and his older brother will be attending Ouachita Baptist College in Arkadelphia, Arkansas.  They are very excited about spending time together...and NO they will not be room mates.  Noah says he has had enough of sharing his room with 18 year olds....besides, upper class-men get better digs.