Followers

Showing posts with label how to. Show all posts

Friday, October 7, 2011

Better than Botox!

"I love my lips!!"

Yes, this is one of my all time favorite memories of my children's childhood. Veggie Tales rock....but those aren't the lips I want to talk about.
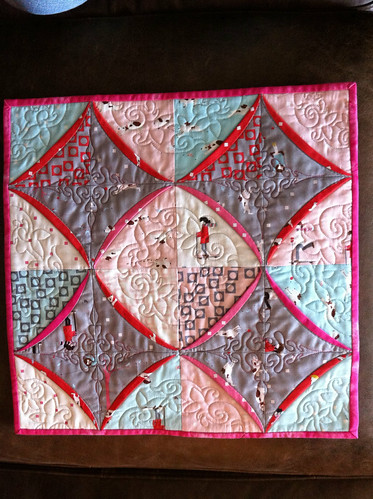
Playing with Pips
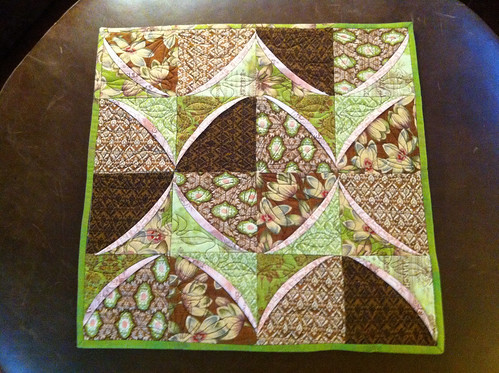
Curios
These are.
I designed both of these little quilts for Flickr swapping. The first one, Playing with Pips, is still up for grabs in the Little Quilt - Sew, Vote, Swap Group. I'm not supposed to tell, but hey they probably know already. Those people are crazy smart. The swap is open October 25th. Check it out. The second, Curios, was made for October 2011 STUD Anything Goes, and one of my dearest friends....Moogiequilter. I don't believe that she is going to give it up to you; however, given enough monetary incentive I would advise her to.

Short of entering LQSVS or bribing Martha these quilts are spoken for, but you could make your own.
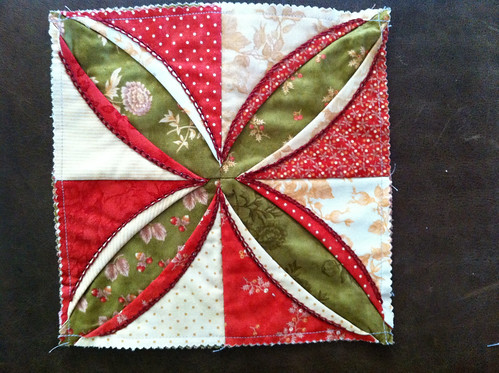
This link will show you how. Lip Tutorial  It is better than Botox! And I guarantee you won't end up in lip rehab with Oscar.

Thursday, September 15, 2011

What to do with an empty spool...

I've been collecting them for years. Each time I empty a spool of thread I toss the spool into this bag and say, "Gee, there ought to be something useful I could do with these." I keep thinking that someday I will string them together with some colorful wool beads and make a garland for my Christmas tree.

Some of the spools come apart. For these, I've finally found a practical use.

Don't they look adorable?! Here is how you do it...

Take the spool apart by twisting then end. It doesn't screw, but the motion will ease the pieces apart. Hook a small paper clip through a medium sized the rubber band.

Thread the rubber band through the small end of the little piece of the spool with the paper clip to the inside.

Pull the rubber band through, catching the paper clip on the spool.

Put the spool back together and stick the rubber band around the other end.

Thread your binding under the rubber band and wind it up. (I cut my binding 2.5" and then fold it in half. The binding in these pictures is 1.25". You could have wider binding and it would still work.)

As you wind it up let the binding wrap over the rubber band.

When you get to the end of your strip, pull the rubber band up and over the knob at the other end of the spool.

Ta-da! Cool, huh.

Saturday, August 20, 2011

Tiny Quilt Binding

I discovered a new and simple way to bind tiny mini quilts and mug rugs, and had to share. I discovered it purely by accident while I was twiddling around with a quilt label.

1) Measure the top of your tiny quilt.
2) Cut batting the same size.

3) Cut backing one inch bigger in both directions. If your top is 3"x5" cut the backing 4"x6".

4) With right sides together, center one edge of backing on top of top and batting.
5) Sew 1/4" seam.

6) Aline parallel edge of backing on parallel edge of top and batting. You will have a "hump" in the backing fabric because it is bigger.
7) Sew 1/4" seam.

8) Flip inside out. And finger press backing so that it curls around the raw edges of the seam allowance. Steam iron.

9) Fold corner 45 degrees so raw edge of backing touches raw edge of tiny quilt sandwich. You may want to pin it this way, as finger pressing tiny bits doesn't always work well. Fold other corner on same raw edge.
10) Steam press. I kept singing my fingers....until I realized that I could use straight pins and stick them through my ironing board cover.

11) Fold raw edge over 1/4" and steam press. Again, it might help avoid burns if you use pins.

12) Roll folded edge over raw edge of quilt sandwich and pin in place. Steam iron. At this point you can fiddle with the "mitered" corner to make it perfect.

13) Repeat process on other side.

14) Top stitch being sure to keep the needle down when you turn corners. Steam press.

Ta-da! Teddy has a new quilt!

Monday, August 8, 2011

HELP! I need to make this easy

I own and manage the neighboring/linked in blog, Quilty Friends.  It is a quilt-a-long/block of the month that I wrote for a friend of mine and am sharing with my local quilt guild.

I'm looking for a way to make the patterns easy to print for them.  Yes, I've tried telling them how easy it is to have the posts e-mailed straight to them.  In that scenario all they have to do is print their e-mail.  Unfortunately, life is never that easy.

They have asked for a button/link/gadget that would send the file to their printer.

Have any of you heard of such a thing?

I could sure use some help.


Thank you all for your help with this.  Maria - thanks for the link.  If you want to do the same for your followers grab the html from www.printfriendly.com and past it into a html gadget rather than your templates code.  It works like a charm!

God bless,
Cindy